

Why Does Perfect On-Screen Alignment Misalign in Print?
Before submitting files, many designers layer printed graphics, foil stamping, embossing, and debossing on screen. If everything snaps together visually, they send it off to print. But dimensional embossing and debossing (post-press processing that creates raised or sunken effects by pressing paper between male and female dies) causes physical deformation. It is not a matter of layer opacity. A 0.1 mm mismatch on screen is invisible to the eye, but on paper it turns into glaring white edges or over-pressing. In my experience over the years, eight or nine out of ten registration failures happen not because the design was off, but because no one accounted for how paper compresses and stretches
In production, foil stamping plates and embossing dies are mounted and aligned separately. Standard tolerances are set to 0.1–0.3 mm is standard. Paper also slides along male die edges by around 0.2 mm during pressing. These issues only show up on paper

How to Separate Black Key Art to Keep Registration under Control
Black key art (100% K black art used by vendors to make dies and set alignment) is the single most critical file between designers and finishing plants. When submitting your file, separate these three layers cleanly:
・Print black art: Graphics and text for CMYK printing, set to K100
・Foil plate art: A separate layer marking foil stamping areas and relative positions
・Embossing plate art: A separate layer marking raised contours and debossing depths
Stacking all three layers on screen looks fine, but acrylic laser cutting, plate making, and machine setups happen independently. If a layer is missing or if all three are flattened into one black key file, technicians have to guess by eye. Wrong guesses mean failed registration. Include a dimensioned diagram showing specific compensation values, such as shifting the embossing die 0.2 mm left relative to the foil plate. That works far better than verbal instructions
Can Paper Thickness and Grain Direction Ruin Embossing?
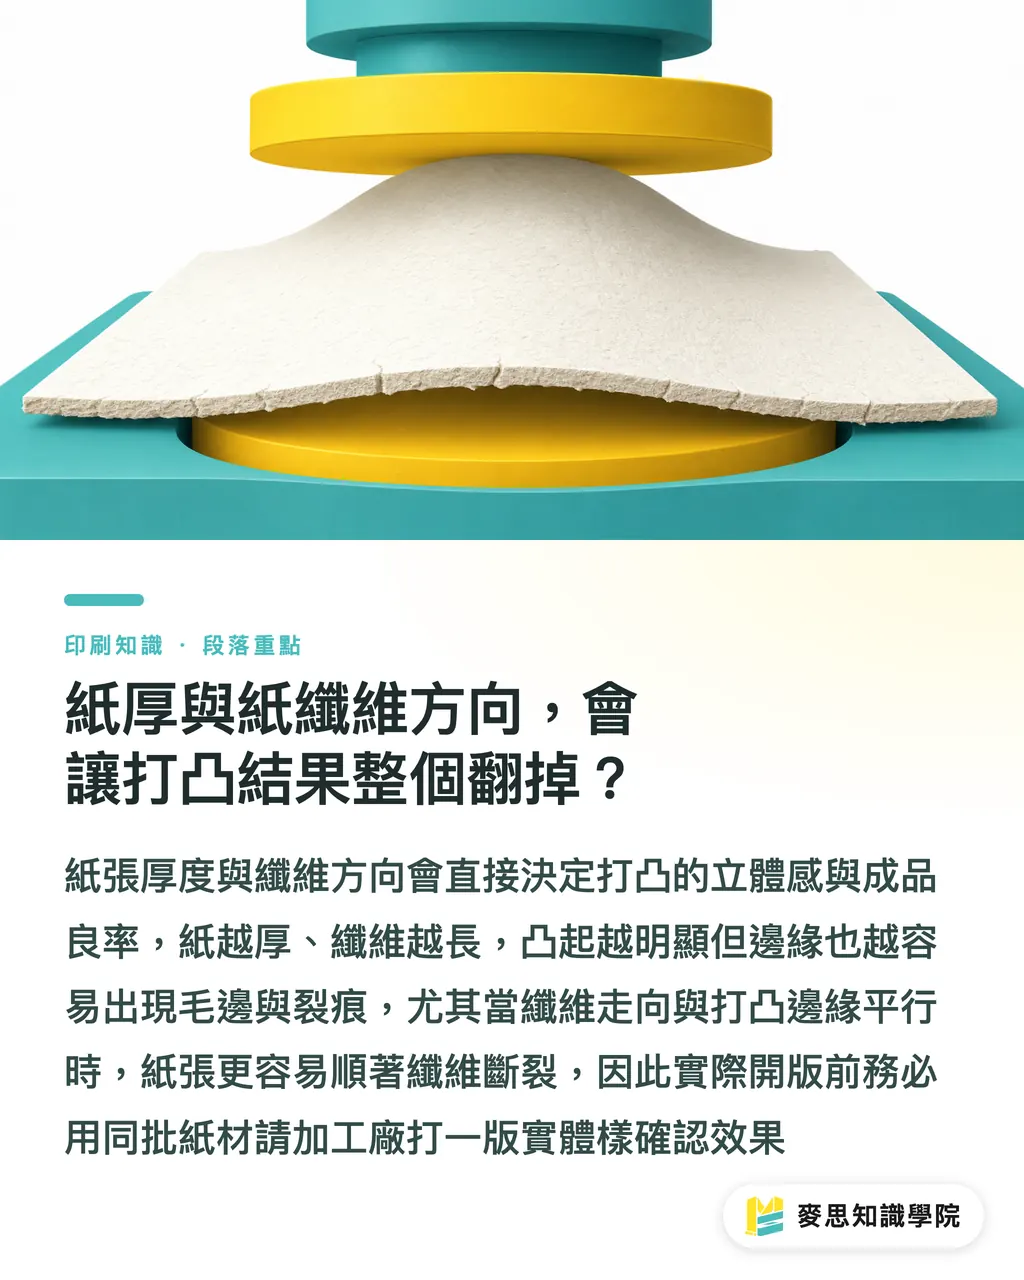
Pressing the exact same die into 150 gsm coated paper versus 350 gsm Linen paper can yield double the relief height. Thicker paper with longer fibers produces a stronger 3D effect, but it also increases the risk of rough edges and cracking. Pay close attention to paper grain direction (the way fibers align during manufacturing, long grain runs parallel to the long edge, short grain runs perpendicular). When fiber direction runs parallel to embossing edges, paper cracks easily along the grain. Perpendicular alignment is far more stable
Key rules of thumb used on the shop floor:
・For fine-line embossing, pick papers over 200 gsm with uniform fibers
・For cross-page embossing, keep paper grain perpendicular to the fold line to prevent cracking when pages turn
・For textured stock like Linen or specialty paper, always produce a physical proof to check relief depth before production
Do not rely solely on digital artwork before making dies. Have the finishing vendor pull a physical proof using paper from the exact same batch
How to Prevent Disasters with Fine Lines and Small Text
Minimum stroke width and font size for embossing depend on paper thickness, pressure settings, and die precision. I have seen too many designers squeeze 6 pt delicate text into embossed areas, resulting in blurry or broken shapes. Here are general practical thresholds:
・Embossed fine lines: Keep stroke width at 0.5 mm or wider
・Embossed small text: Keep font size at 8 pt or larger (headlines can be smaller, body text needs to be bigger)
・Debossing dies require deeper pressure and stricter limits, keep fine lines at 0.8 mm or wider
If your artwork contains intricate details, restrict embossing to large contour areas. Use foil stamping or standard printing for tiny details. Forcing fine details into embossed areas only sends scrap rates through the roof
Settle Edge Treatments and Pressure Depth Before Laser Cutting Dies
Edge finishing and pressure depth on embossing dies directly impact visual quality and structural integrity. Two common edge treatments are:
・Bevel edge: Slanted edges create a softer look, ideal for large graphics
・Sharp edge: Vertical edges produce crisp outlines, ideal for fine lines and geometric shapes
Confirm pressure depth during proofing. Shallow embossing lacks 3D depth, while excess pressure tears paper and breaks fibers. For premium packaging, embossing depth typically ranges between 40% and 60% of paper thickness, depending on the stock. There is no single formula, it requires testing with physical proofs
Pre-Flight Self-Checks to Reduce Factory Rejections
I divide the pre-flight checklist into three gates, which forms the core logic behind the MINDS (MS) Pre-Press 3-Step Audit:
・Clear black art layers: Keep print black, foil stamping, and embossing on distinct, identifiable layers
・Enlarge thin lines and small text: Keep lines ≥ 0.5 mm and text ≥ 8 pt, with looser limits for debossing
・Allow edge margins: Maintain at least a 5 mm safety distance between artwork edges and paper trims
The final and most vital gate: verify with a physical proof. Do not just send digital files, and do not trust on-screen layer stacking. Embossing and debossing are physical processes. Paper stretches, dies shift. Only by holding a physical proof in hand and tilting impression edges toward the light can you judge whether variations fall within tolerance
For luxury packaging, gift boxes, or book covers that demand top-tier texture and require seamless paper selection, post-press finishing, and binding, turn to the custom mid-to-high-end commercial printing services at MINDS. Let experienced technicians manage variables in paper, finishing, and foiling so you can focus on building rock-solid file structures

Key Takeaways
・On-screen alignment does not guarantee print alignment, physical paper deformation cannot be seen on a display
・Clean black key art separation is the absolute minimum requirement for factories to execute your design
・Paper thickness and grain direction directly decide whether embossing succeeds or fails
・Fine lines at 0.5 mm and text at 8 pt serve as safe starting baselines, debossing needs even wider limits
・Always inspect physical proofs before final sign-off, digital files are only the starting point
Further Considerations
From a production consultant's viewpoint, embossing alignment is not a design issue, it is a communication issue. Designers understand layers and color, but often lack grasp of physical paper mechanics. Finishing plants understand machinery and materials, but often interpret design intent from a single mock-up diagram. Closing that gap takes three things: cleanly separated black key art, physical proofs pulled on identical paper stock, and the habit of quantifying tolerances in file submission notes. Put those three elements in place, post-press rejection rates drop sharply, and luxury packaging texture shines as intended
Further Reading
FAQ
- What is the acceptable registration tolerance for embossing and debossing?
- In practice, foil plates and embossing dies each carry independent tolerances of 0.1 to 0.3 mm. Paper also slides by about 0.2 mm at the moment of impact. Combined, visually acceptable total tolerance ranges from 0.3 to 0.5 mm. Anything beyond that creates visible white edges or over-pressing
- Must black key art be submitted on separate layers? Can layers be merged?
- Layers must be separated. Print black, foil stamping, and embossing artwork serve as three distinct references that shift independently during post-press finishing. Merging them into a single black layer prevents technicians from achieving precise alignment. Layer separation is the absolute minimum requirement
- Which paper stocks are not recommended for embossing?
- Avoid papers under 150 gsm, recycled papers with short fibers, and heavy coated stocks. Insufficient thickness results in weak relief depth, while heavy coatings easily crack along impression edges
- What is the minimum limit for fine lines in embossing?
- A general rule of thumb is keeping line width at 0.5 mm or wider and font size at 8 pt or larger. Debossing requires even stricter limits due to deeper pressure. Actual limits depend on paper stock and press settings, so verifying with a physical proof is recommended
- Is a physical proof mandatory before file submission?
- Yes. Embossing and debossing cause physical deformation. On-screen layer stacking cannot predict paper sliding or die movement. Only physical proofs verify whether tolerances stay within acceptable limits
Related articles





The Print × AI weekly
The print and AI know-how designers, brands and enterprises can use before they commit — one email, every week
MINDS Free Tools
Spine width and imposition calculators — skip the manual math, free in your browser.
MINDS Group
Need actual printing or gifting services?
From premium printing to online ordering and festive gifts — the MINDS Group sister brands take it from here.